Tuesday, May 10, 2016

GRAM STAINING

 Introduction:
Gram staining is a method of differentiating bacterial species into two large groups: Gram positive and Gram negative.

Objectives:
1. Differentiate yogurt bacteria (Streptococcus and Lactobacillus)
2. Relate the staining procedure with the structure of the cells.

Material:
- Slide
- Cover slip
- Tongs
- Needle
- Gram stain: crystal violet, iodine and safranin
- Decolorize reagenti: ethanol 96%
- Microscope
- Yogurt

Procedure:
1. Fix the piece go yogurt
2. Add crystal violet (1 minute and 30 seconds)
3. Add water
4. Add Lugol (1 minute)
5. Add water
6. Add ethanol
7. Add safranin (1 minute)
8. Add water


Observations:
We can see the bacteria of the yogurt 

Tuesday, May 3, 2016

MITOSIS IN AN ONION ROOT

Introduction: 
In this experiment we will see the parts of the mitosi (interfase, profase, metafase, anafase and teloface) in a onion root.


Material:
- Microscope
- Slide
- Coverslip
-Dropper
-Needles emmanegades
- Watch glass
- Beaker
- Thin tongs
- lighter
- Cellulose paper

Quemical products: distilled water, Orceine A and B and normal water.
Natural products: Onion

Procedure: 

1). Put the onion in a beaker with water one week (the roots need to touch the water). 
2). When the roots grow up 3cm, cut the final 4 mm and put in the watch glass with orceine A. 
Then, you need to put in  the heater with the flame of the lighter until you see vapor (In this process the temperature can't pass the 60 C). 
3). With the tongs take the piece of the root and put in a slide and put the orceine B with the dropper. 
4). Put the coverslip and with a piece of cellulose paper you need to push and turn in the coverslide to extend de cells. 
5). Observe with the microscope with 600 increases and you will see the parts of the mitosi. 


Observations: 


In this experiment we can't see very well the different parts of the mitosis. 


Monday, April 25, 2016

NANOENCAPSULATION

Material: 
- Sodium alginate
- Sodium chloride
- Coca-Cola
- Beaker
- Pipet
- Strainer

Procedure: 
- We need to mix the sodium chloride with the sodium alginate (contain the coca-cola).
- You will see a gelatinous form that precipitated and you will have the pill.
- Take the strainer and the coca-cola is inside.

Process of nanoencapsulation:


APLICATIONS OF NANOENCAPSULATION:
1. The first aplication is with the food industry: incorporation food ingredients, enzymes, cells or other materials in small devices (nano- scale or micrometer). These devices are obtained
coating or Entrapment of a material or a mixture.


2. In the second aplication we see the development of new materials,  including biomaterials and biocomposites for food, pharmaceutical, biomedical, chemical and hydrocarbon packaging applications.

3. Development of new micro and nanoencapsulation systems for the protection of various bioactive ingredients

BIOTEST

Material:
- Nanoparticles of gold
- Watch glass
- Distilled water
- Water with sugar
- NaCl

Procedure: 
We need to know that the nanoparticles of gold change their color when we change the aggregation.
- Take the watch glasses with nanoparticles.
- In the first one put distilled water (don't change the color).
- In the second one put water with sugar (don't change the color).
- In the third one put NaCl (the color change).


Question: 
Why change the color when we put NaCl?
Because the nanoparticles of gold do the aggregation (recombination of the nanoparticles).

BIOTOXICITY

Material:
- Nanoparticles of silver
- Sugar and yeast
- Distilled water
- Erlenmeyer
- Hot plate
- Ballon
- Spatula
- Pipet

Procedure:
We need to know that the nanoparticles damage the live cells and toxit activity.
- Take three erlenmeyer:
                            1r: Control: One spoon of sugar, yeast and water.
                            2n: The same quantity of sugar, yeast, water and 1ml of nanoparticles of                                               silver.
                            3r: The same quantity of sugar, yeast, water and 3ml of nanoparticles.

- Put the Erlenmeyers in the hot plate.


Conclusions:
We see that the experiment produce CO2 and we see that the ballon inflate.

Question:
Why not inflate the last ballon?
Because the nanoparticles kill the yeast and there isn't fermentation.


NANOSCALE

Material: 
- Two beakers
- Mortes
- Two effervescent tablet

Procedure: 
1. We need to take the two effervescent tablet.
2. We need to brake one of the effervescent tablet using the morter.
3. In each beaker put a little bit of water.
4. In the first beaker put the effervescent tablet, and in the second beaker put the broken one.


Conclusions: 
We can see that the broken effervescent tablet have a quickly reaccion than the other one.

Question: 
Why the crushed table was faster? 
Because there are more surface and the nanoparticles react more quickly.

Monday, March 14, 2016

LEAF PIGMENT CHROMATOGRAPHY

Introduction: In this experiment we will see different plants pigments. That pigments are: chlorophyll, xanthophyll and carotens.

Objective: 
To do the process of chromatography (separate the pigments with ethanol)

Material: 
- Mortar ans Pestle
- Funnel
- Scissors
- Graduated Cylinder
- Sand
- Beaker (250ml) or a petri dish
- Ethanol
- Calcium carbonate
- Spinachs
- Cellulose paper

PROCEDURE:
1. Take 6/7 leafs of spinacks and cut in small pieces with the scissors.
2. Put the small pieces inside the mortar with the spatula and put a little bit of sand inside de mortar.
3. With the spatula take calcium carbonate and put inside with the leafs and the sand.
4. Add 50 ml of ethanol.
5. You need to grind
6. Finally, you need to filter the mixture and extract the liquid.


- Cut a paper strip with the cellulose paper and put inside the beaker (with the liquid that we extract)
- Do the same with the petri dish, but you need to bend the cellulose paper.
- The liquid that you have in the graduated cylinder put in front of the light.


QUESTIONS: 
1. Why do we add sand?
To brake the cells, we brake the cloroplast.
2. Why do we add calcium carbonate?
Prevents the pigments degradation.
3. Which is the color of every pigment?
 chlorophyll (verd), xanthophyll (yellow) and carotens (orange).
4. What adaptative purpose do different colored pigments serve for a plant?
to capture different light wavelengths
5. Why do they separate on the cellulose paper?
For the solubility

CALCULATE: 


Monday, March 7, 2016

CHROMOPLAST & AMILOPLASTS OBSERVATION

INTRODUCTION: 
In this experiment we will use a potato and tomato to observe the cells that are inside of them.
amylopectin: Cells that keep the starch. 
Chromoplast: Keep pigments. 

OBJECTIVES: 
- To see the pigments of the tomato and if all the cell is red. 
- With the potato, to see the aminoplasts


FIRST PART: PROCEDURE OF THE TOMATO:
1. Peel the tomato and take a small part of the pulp. 
2. Prepare a procedure called squash. 
3. Observe with the microscope. 
4. Cut a small piece of paper (2cm) and you need to push and to turn with the finger to the tomato, and then take away the paper. 

OBSERVATIONS: 
The cells are white/transparent, and form red pigments that are the cloroplast. 

SECOND PART: PROCEDURE OF THE POTATO:
1. You need to cut a small piece of potato and to take the white liquid that is insade of the potato with a dropper. 
2. You need to put the liquid with the light a few minutes (the liquid need to be dry). 
3. Put a few drops of lugol and wait 3 minutes. 
4. Observe with the microscope. 


OBSERVATIONS: 
You can see the aminoplasts. 

MICROTOME PART:
1. We need distilled water and with the microtome cut the piece of potato ant put inside the distilled water. 
2. Dye the piece of potato. 
3. Observe with the microscope. 


OBSERVATIONS: 
We observe the starch organelles inside the cell. 
We count arround 12-20 organnels in each cell. 


Tuesday, March 1, 2016

LIFE IN A DROP OF WATER

INTRODUCTION
In this experiment we took some drops of water of different places (water of a fishbowl, stagnant water... Etc)

OBJECTIVES:
- To see if there are organism alive.

MATERIAL:
- Dropper
- Microscope
- Coverslips

PROCEDURE:
1. We took with the dropper some drops of the different water.
2. We tried to see organisms alive with the microscope.


--------> To observe with the microscope


RESULTS: 


Tuesday, February 23, 2016

RED ONION OSMOSIS

Introduction: 
In this experiment we will see the process called osmosis of a red onion, with different material (distilled water, salt water and a microscope).

Objectives:
- To see what happens to the piece of onion when we put distilled water and salt water.

Process:
PHASE 1: NORMAL CELLS/DRY MOUNT 
1. Carefully slice away the colored layer of cells from the red onion. This should only be the thin purple layer. Trim to get a piece about this actual size.
2. Place the thin, purple onion layer on a dry microscope slide shinny side up-do not put on water or cover slip yet.
3. Scan the entire onion tissue on low power to find and center the most purple area and focus. Set the microscope to medium power and focus the view.
4. Take a picture


PHASE 2: SALT WATER ENVIRONMENT/WET MOUNT 
Now that you have observed the layer of normal cells which are the subject of this lab, make a wet mount using 2 or 3 drops of salt water solution on the onion tissue then install cover slip.

5. Watch the cells for approximately 2-3 minutes or longer as you again survey the entire onion tissue on low power. You should see changes within many of the cells intially near the perimeter of the onion tissue. As time passes all or most of the cells shoulb become affected by the salt water. Find some cells that have noticeably been affected and observe them under medium power.


Obervations: We can see the process of plasmolosis 


PHASE 3: DISTILLED WATER ENVIRONMENT/WET MOUNT 

6. After you have colored the diagram correctly above, you need to prepare for phase 3 of this lab by putting the entire salt water wet mount in the dish of tap water to rinse off the salt water from the slide, cover slip and onion tissue layer. Dry the slide and cover-slip then gently dab the onion tissue dry.

7. Make a wet mount of the onion tissue you just rinsed using 2 or 3 drops of distilled water on the onion tissue then install cover slip. Watch the cells for approximately 2-3 minutes or longer as you again survey the entire onion tissue on low power. You should see changes within many of the cells intially near the oerimeter of the onion tissue. As tine passes all or most of the cells should become affected by the distilled water. Find some cells that have noticeably been affected by the distilled water and observe them under medium power.


Observations: The cells become more bigger because they took the water

Questions: 
1. When the salt solution was added to the onion cells, where was the greater concentration (most pure) of water? (inside or outside the cell membrane). How do know this? Explain:
Answer: Inside, because outside is the salt solution.

2. In the winter, grass often dies near the roads that have been covered in salt to remove the ice. Using what you have learned in this experiment, what do you think is the reason the grass dies?
Answer: The cells leaved water.

3. Which kinf of transport does water follow across the membrane?
Answer: Passive (membrane difussion)

Sunday, February 14, 2016

ANIMAL CELLS vs PLANT CELLS

Introduction
In this experiment we will se the difference between animal cells and plant cells, using different food (onion)
The Material that we need is: Toothpick, 2 slides, 2 covers slips, distilled water, methylene blue, iodine, onion, glycerine.

Objectives
1. Identify the major components of cells. 
2. Differemtiate between animal and plant cells. 
3. Measure dimensions of the entire cell and nucleus. 

Procedure 
(PLANT CELLS OBSERVATION)

1.  Pour some distilled water into a watch glass. 
2. Peel off the leaf from half a piece of onion and using forceps, pull out a piece of transparent onion peel (epiderms) from the leaf. 
3. Put the epiderms in the watch glass containing distilled water. 
4. Take a few drops of iodine solution (or safranin) in a dropper and transfer into another watch glass. 
5. Using a brush (or a needle), transfer the peel into the watch glass containing the dye. Let this remain in the safranin solution (or iodine) for 30 seconds, so that peel is stained. 
6. Take the peel from the iodine solution and place it in the watcg glass containing distilled water. 
7. Take a few drops of glycerine in a dropper and pour 2 or 3 drops at the center of a dry glass slide. 
8. Using the brush, place the peel onto the slide containing glycerine. 
9. Take a cover slip and place it gently on the peel with the aid of a needle. 
10. Remove the extra glycerine using cellulose paper. 
11. View in the microscope. 


RESULTS


Tuesday, February 2, 2016

DNA EXTRACTION

INTRODUCTION: 
Deoxyribonucleic acid (DNA) is a nucleic acid that encodes the genetic instructions used in the development and functioning of all known living organisms and many viruses.
Nucleic acids are biopolymers formed by simple units called nucleotides. Each nucleotide is composed of a nitrogen-containing nucleobase (G, T, C, A) as well as a monosaccharide and a phospate group.

OBJECTIVES: 
1. Study DNA structure.
2. Understand the process of extracting DNA from a tissue.

PROCEDURE:
(Put the ethanol in the freezer) 

- Prepare the buffer in a 0'5L beaker: Add 450mL of tap water, 25mL of a dish soap and 7g NaCl. Stir the mixture.

1. Peel the kiwi/banana and chop it to small pieces. Place the pieces of the kiwi in one 600mL beaker and smash with a fork until it becomes a juice puree. 
2- Add 8mL of buffer to the beaker. 
3. Mash the kiwi/banana puree carefully for 1 minute without creating many bubbles. 
4. Filter the mixture: put the funnel on top of the graduated cylinder. Place the cheesecloth on top of the funnel. 
5. Add beaker contain carefully on top of the cheesecloth to fill the graduated cylinder. The juice will drain through the chessecloth but the chucks of kiwi/banana will not pass through into the graduated cylinder. 
6. Add the pineapple juice to the green juice (you will need about 1mL of pineaplle juice to 5mL of the green mixture DNA solution). This step will help us to obtain a purer solution of DNA. Pineapple juice contains an enzyme that breaks down proteins. 
7. Tilt the graduated cylinder and pour in a equal amount of ethanol witg an automatic pipet. Put the ethanol through the sides of the graduated cylinder very carefully. You will need about equal volumes of DNA solution to ethanol. 


8. Place the graduated cylinder so that it is eye level. Using the stirring rod, collect DNA at the boundary of ethanol and kiwi/banana juice. Do not stir the kiwi juice; only stir in the above ethanol layer. 
9. The DNA precipitate looks like long, white and thin fibers. 
10. Gently remove the stirring rod and examine what DNA looks like. 


FINAL RESULT:
This is the final result when que took the DNA and we saw it with the microscope. 


Thursday, January 21, 2016

Determinació de: llet, caseïna, altres proteïnes, midó i glúcids reductors i presència de lípids

Determinació de la composició de la llet:
La llet conté vitamines (tiamina, riboflavina, àcid pantotènic i vitamines A, D i K), minerals (calci, potassi, sodi, fòsfor i metalls en petites quantitats), proeïnes, glúcids i lípids. Els únics elements importants que no te són ferro i vitamina C.

Pràctica: identificar tots aquests components (resum de totes les proves d'identificació)

1- Determinació de la caseïna:
La caseïna és una proteïna conjugada del tipus fosfoproteïna que se separa de la llet per acidificació i forma una massa blanca. Les fosfoproteïnes són un grup de proteïnes que es troben químicament unides a àcid fosfòric, en el cas de la caseïna aquests grups fòsfor es troben units als aminoàcids serina i treonina. La caseïna representa entre 77 i el 82% de les proteïnes presents a la llet. Aquesta proteïna presenta una baixa solubilitat a pH 4,6. En la primera part del experiment aïllareu la caseïna.

1- Afegiu 200ml de llet en un vas de precipitats i escalfeu fins 40 graus aproximadament.
2- Traieu-lo del foc i afegiu gota a gota àcid acètic (1ml d'àcid acètic glacial en 10 ml d'aigua destil.lada) amb un comptagotes. Agiteu amb una vareta de vidre fins que acabi de precipitar tota la caseïna. (No afegir massa àcid acètic)

3- Separeu la caseïna amb ajuda d'una espàtula i poseu-la en un vidre de rellotge. Poseu-lo a assecar en la placa calenta.
4- Afegir immediatament en el líquid que us ha quedat 4 gr de carbonat de calci en pols. Agiteu al llarg d'uns minuts i guardeu-lo per la següent part. Això és el sèrum de la llet.
5- Quan la caseïna hagi perdut l'aigua calculeu el percentatge de caseïna aïllada sabent que la densitat de la llet és 1,03 g/ml.


2- Determinació d'altres proteïnes:
Determineu la presència d'altres proteïnes en l'extracte (sèrum) de la pràctica anterior mitjançant la prova de Biuret. 
- 2ml de sèrum 
- 2ml d'hidròxid de sodi
- 5 gotes de sulfat de coure 


3- Determinació del midó i glúcids reductors:
Determineu si la llet conté midó en el producte que heu extret (sèrum) de la pràctica anterior. 
Determinar la presència de glúcids reductors. 
- Petita quantitat de sèrum + lugol 
- Sudan III 

4- Determinació de la presència de lípids:
Determineu la presència de lípids de la llet en un tub d'assaig amb 2ml de llet. 
Al final afegiu 1ml d'HCL al 50% al tub d'assaig anterior i escalfeu suaument, anoteu els resultats que observeu. 
Proveu-lo també amb el sèrum de la llet de la pràctica 1. 

- 2ml fehling A/B 


Resultats:


Tuesday, January 5, 2016

PROTEIN DENATURATION

INTRODUCTION: 
Denaturation is a process in wich proteins or nucleic acids lose the quaternary, tertiary and secondary structure that is present in their native state. Denaturation is the result of the application of some external stress (heat and pH change) or compounds such as a strong acid or base, a concentrated inorganic salt or organic solvent.

OBJECTIVES: 
1-Study the relation between the structure and the function of proteins.
2- Understand how temperature, pH and salinity affect to the protein structure.


CATALASE ACTIVITY: 
Catalase is a common enzyme found in nearly all-living organisms exposed to oxygen. It catalyzes the decomposition of hydrogen perioxide (H2O2) to water and oxygen. It is a very important enzyme in protecting the cell from oxidative damage and preventing the accumulation of hydrogen peroxide.

PROCEDURE:
In this experiment we are going to test the catalse activity in different environment situations.  We are going to measure the rate of enzyme activity under various conditions, such as different pH values and temperatures. We will measure catalse activity by observing the oxygen gas bubbles when H2O2 is destroyed. If lots of bubbles are producted, it means the reaction is happening quickly and the catalase enzyme is very active. 
1- Prepare 30 ml  of H2O2 10% in a beaker (use a pipet) 
2- Prepare 30 ml of HCL 10% in a beaker.                          -------> Solutions
3- Prepare 30 ml of NaCL 50% in a beaker. 
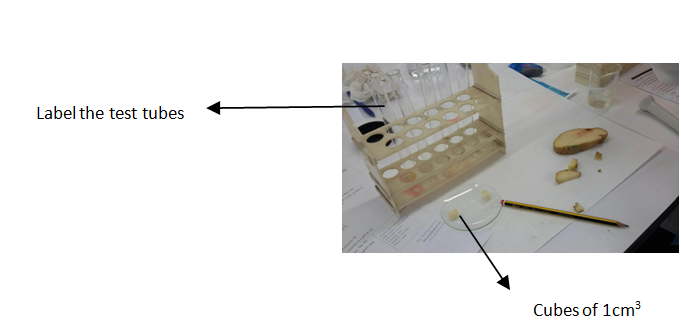
4- Peel a fresh potato tuber and cut the tissue in five cubes of 1cm3. Weigh them and equal the mass. 
5- Label 5 test tubes (1,2,3,4,5)
6- Immerse 10 minutes your piece of potato inside the HCL beaker 
                                                         HCL SOLUTION

 7- Immerse 10 minutes another piece of potato inside NaCL beaker.
8- Boil another piece of potato.
9- With a mortar, mash up the third piece of potato.
10- Prepare 5 test tubes as indicated below:


11- Add  5ml H2O2 in each test tube
12- With a glass-marking pen mark the heigh of the bubbles. Measure it with a ruler.
13- Compare the results of the 5 test tubes.

Table with the important parts of the experiment:
RESULTS: 


 QUESTIONS:
1. How did the temperature of the potato affect the activity of catalase?  
Temperature denaturate the catalase. 
2. How did the change of the pH of the potato affect the activity of catalase?
The change of the Ph denaturate the catalase. 
3. In wich potato treatment was catalase the most active? Why do you think this was?
Mashed potato,  because we had broken the cells and the catalase was more quickly. 
4. An experiment was performed to test the effect of temperature and pH on the activity of Enzyme X. The following data was collected during the experiment: 


a) What is the optimum pH of enzyme X? 8 (maximum activity)
b) What is the optimum temperature of enzyme X? 20 (maximum activity)
c) Why do you think enzyme X has low activity at a pH of 10? Because has been denatured 
 d) Enzyme X perfoms critical life functions. Use the data above to explain why a fever of  40 degrees may be dangerous. 
 Beacuse is more lower than the maximum activity.